
A capacitor is a device that is very important in the case of most of the electronic appliances. They are used in computers, power supplies, and with appliances that use a motor. In the case of an appliance with a motor, if it is not working or if it is producing a humming noise, then the problem might be associated with the starter capacitor. A capacitor can be tested to find out whether it is working properly or if it is dead. There are certain steps that you need to follow for testing the capacitor to find out whether it is bad or not. Let’s get right to it.
Removing the Capacitor
The first thing that you need to do is to remove the capacitor from the appliance with which it is associated. Be careful not to touch the terminals. After you remove the capacitor, you will need to discharge this capacitor. The discharging of the capacitor can be done by attaching the terminals of the capacitor to a 120v light bulb with low wattage. Make sure you discharge the capacitor fully before moving on. This is very important as a fully charged capacitor can be dangerous to both you and your multimeter.
Finding the Expected Capacitor Value
The value of the capacitor should be calculated or researched before you start testing the capacitor. Once you know the value, then only can you decide whether the capacitor is bad or functioning properly. The value of the capacitor is calculated in terms of microfarads, nanofarads and also in picofarads. In the case of electrolytic capacitors, the value should be seen written on it and so there is no need for you to calculate it or research the value. In this case, you can make use of the multimeter directly to find whether the capacitor is functioning properly or not.
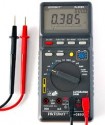
Setting the meter
Next, the meter should be set in a proper manner before you start testing. Setting the multimeter correctly will depend on what the expected value of the capacitor is. For example, if you have a 1000uf capacitor, you will need to set your multimeter somewhere above 1000uF. For example, if your capacitor has a setting for 2000uf, this would work. This will differ by multimeter and the capacitor, but it shouldn’t be too difficult to figure out. This initialization is very much required for finding out the value associated with the capacitor so that it can be compared with its expected value.
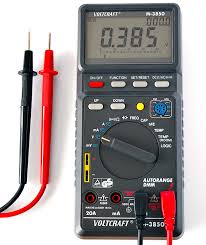
Connections
Now that you have your meter all set, you can connect the multimeter to the capacitor by taking the two leads and attaching them to the terminals. After it is connected, you can be compare the actual value to the value you expected to see. This comparison can help you find whether it is good capacitor or malfunctioning one.
Reading & Comparison
Once the capacitor is connected to the multimeter, you should start to see some readings. You should take note of the reading that appeared.
You will want to compare the measured value with the expected value. If these are off by more than 10%, then you can consider the capacitor to be faulty.